Start with contrast and backlight
The foundation of a silhouette is simple: place the subject between your camera and a bright background. The subject becomes dark because the exposure is based on the light behind it, not on the subject itself.
This works beautifully in wildlife and nature photography because animals, trees, branches, dunes, and birds in flight can become strong graphic forms when the background is bright and clean.
Expose for the bright background, then allow the subject to fall into shadow
Choose a clean location and the right time
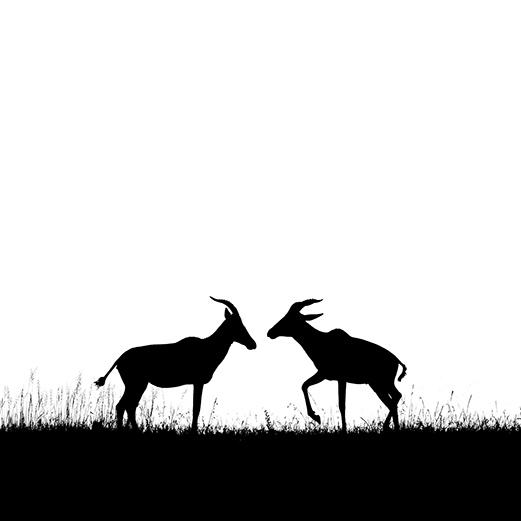
A good silhouette needs separation. Look for open skies, low horizons, dune ridges, wetlands, beaches, plains, or any place where the subject can be placed against a bright and uncluttered background.
Golden hour
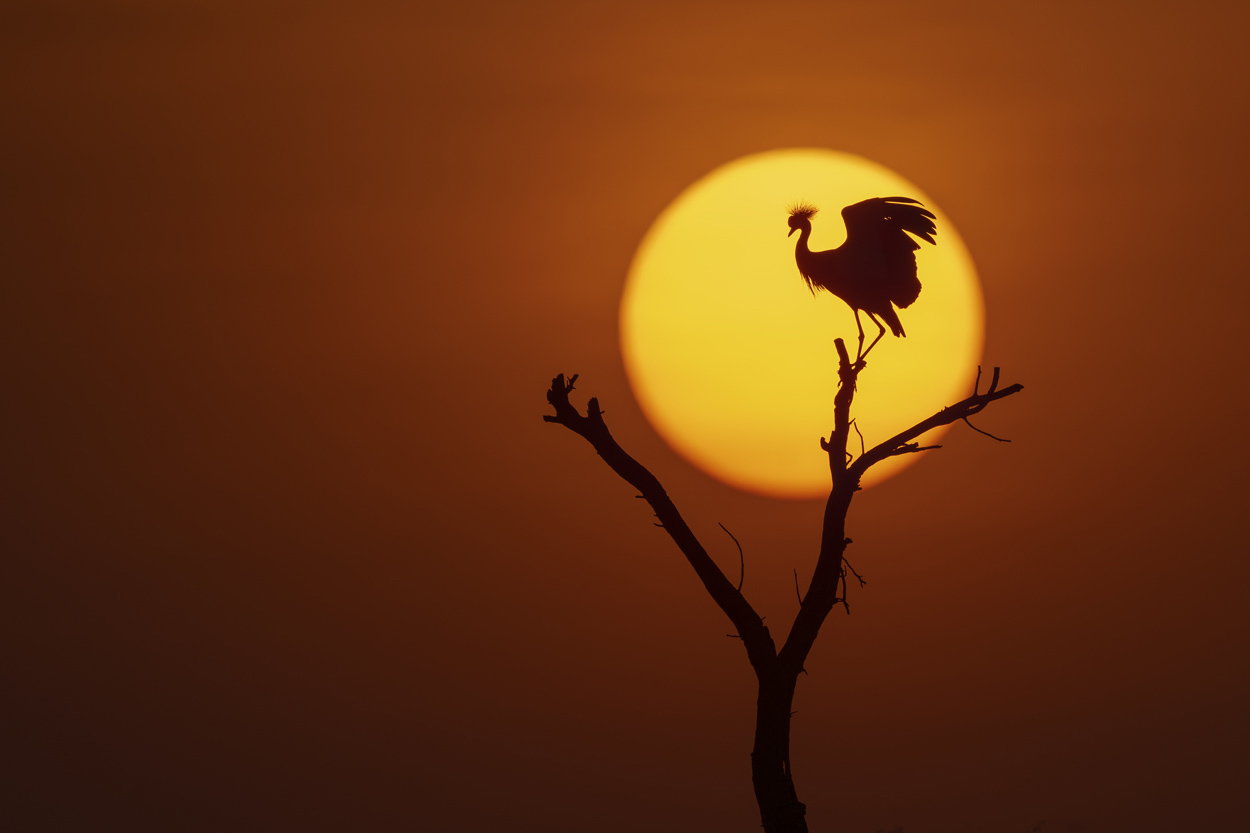
Sunrise and sunset give warm gradients, long shadows, and strong contrast. These conditions are ideal for classic silhouette photographs.
Blue hour and bright skies
Silhouettes do not always need a visible sun. A bright open sky, pale water, or a glowing background after sunset can also create a clean and elegant result.
Shape is everything
When the subject turns black, internal detail disappears. The outline must carry the whole photograph. Wait for a clear profile angle, open wing shape, separated legs, or a gesture that can be understood immediately.
Profile views
For birds, mammals, and wildlife subjects, profile views are often the strongest. A beak, horn, snout, or ear becomes more recognizable when it is seen from the side.
Separation
Avoid overlapping shapes. If an animal’s legs merge together, or a bird’s wing overlaps the body, the subject can become a heavy black mass. Wait for the moment when the shape opens.
Camera settings for silhouettes
Your camera’s meter may try to brighten the dark subject, which can ruin the silhouette and overexpose the background. The goal is to take control of the exposure so the background is protected and the subject remains dark.
Keep ISO low for clean shadows and better image quality.
Use a smaller aperture when you want sharp edges and deeper depth of field.
Use a fast shutter speed to freeze motion and hold the dark silhouette.
Manual mode
Manual mode gives consistent results. Meter from the bright background, set your exposure, then recompose and wait for the subject gesture.
Spot metering
Spot metering is useful because it reads a small area of the frame. Aim at the bright sky or background beside the sun, not directly at the dark subject.
Turn off flash
Any flash will add light to the subject and reduce the silhouette effect. Keep flash disabled unless you intentionally want a different mixed-light style.
Use AE Lock when recomposing
AE Lock allows you to meter from a specific bright area, lock that exposure, and then recompose without the camera recalculating the scene. This is especially useful when the subject moves through different backgrounds.
For a silhouette, meter from the bright sky or background, lock the exposure, then place the subject where the composition is strongest.
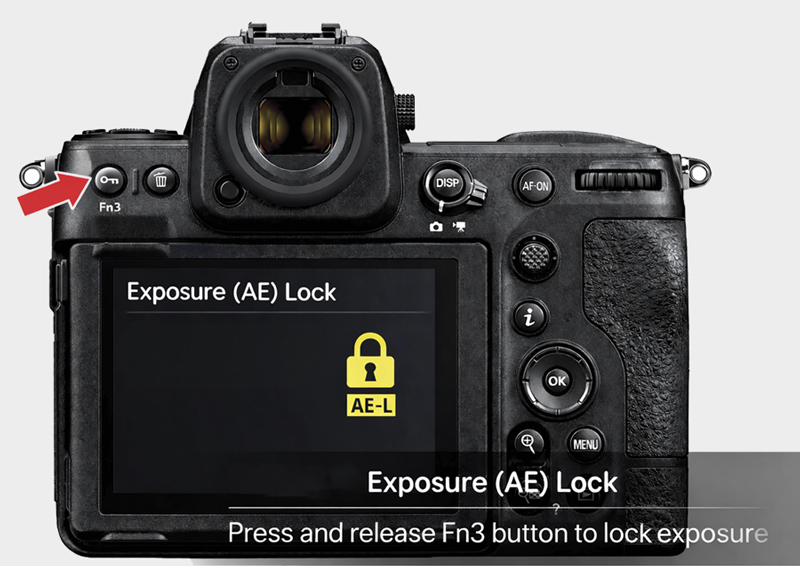
Suggested Nikon Z8 / Z9 AE Lock setup
- Press the MENU button.
- Go to the Custom Settings Menu.
- Open f Controls.
- Select f2 Custom controls for shooting.
- Choose the Fn3 button.
- Assign AE lock reset on release.
- Press OK to confirm.
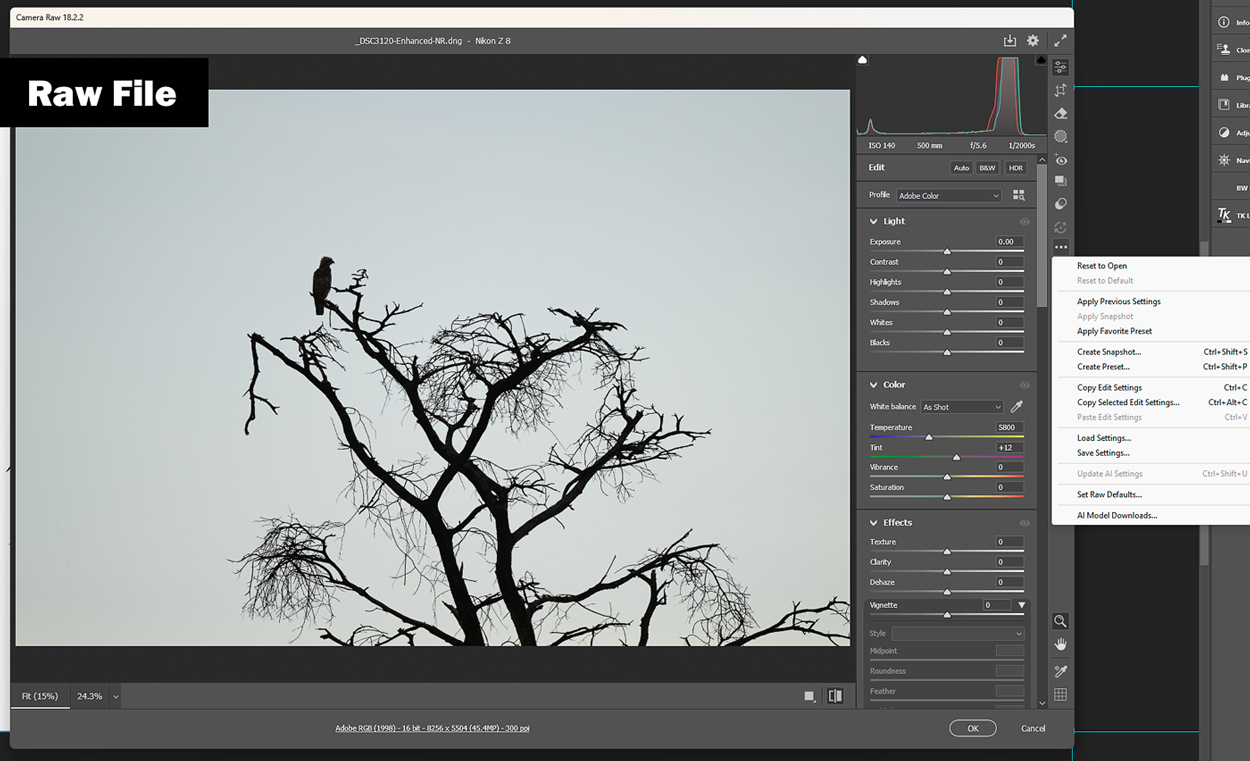
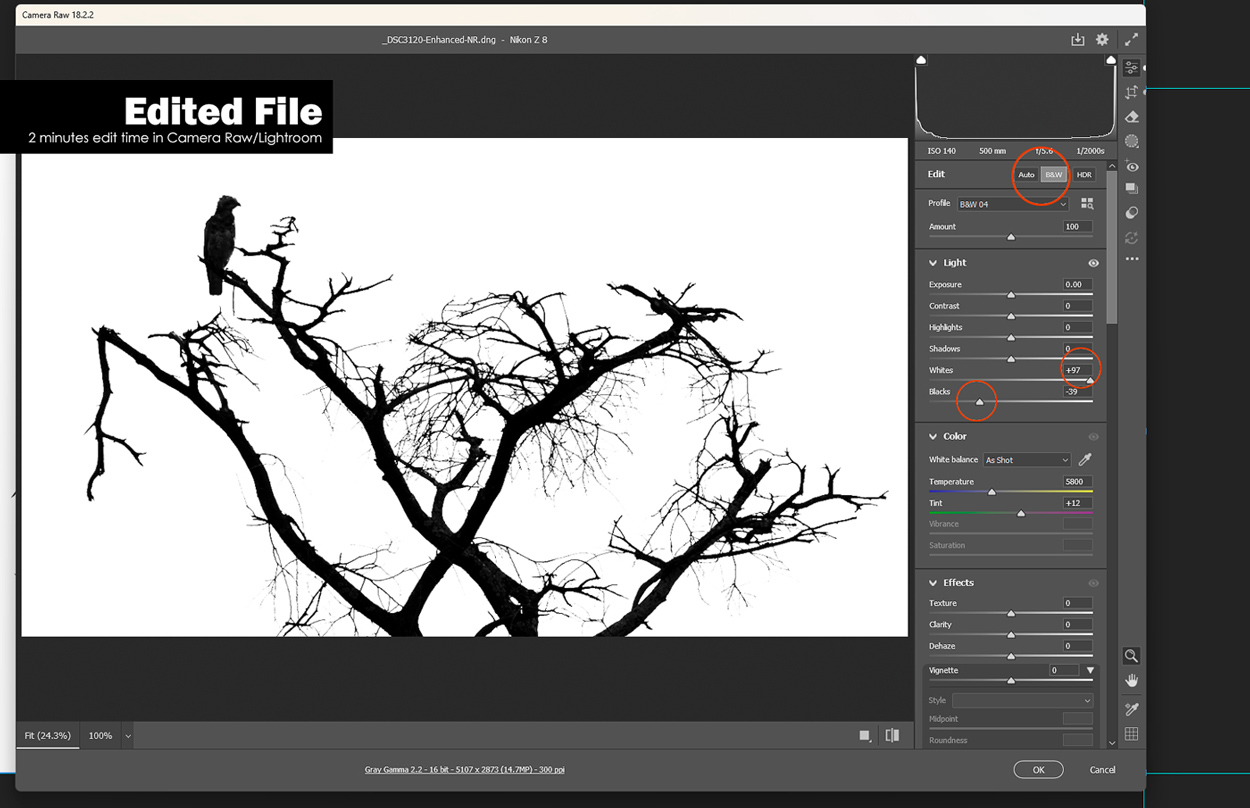
Polish the image in editing
Silhouette editing should be simple. The image should already be close in camera. In editing, deepen the blacks and shadows, refine contrast, and make sure the bright background still feels clean and natural.
Quick workflow
- Find a clean, bright background.
- Place the subject between the camera and the light.
- Wait for a profile or clearly readable shape.
- Meter from the bright background, not the subject.
- Lock the exposure or use manual settings.
- Refine blacks, shadows, and contrast in editing.
FAQ silhouette photography
What is silhouette photography?
It is a style where the subject appears as a dark shape against a brighter background, usually created by exposing for the background instead of the subject.
What is the best time for silhouette photography?
Sunrise and sunset are ideal because they provide strong backlight, warm colour, and clean sky gradients.
Should I use manual mode?
Manual mode is often the best option because it keeps the exposure consistent while you recompose and wait for the right subject gesture.
Where should I meter?
Meter from the bright background, such as the sky near the subject. This makes the subject darker and helps create the silhouette.
Can silhouette photography work in black and white?
Yes. Silhouettes can be very strong in black and white because the image depends on shape, contrast, and clean composition.